Feeds:
Posts
Comments

Potato 2

This recipe comes from Ester Restaurant in Sydney.  The restaurant serves it with a cultured kefir cream, dashi jelly and salmon roe but it the “crusty on the outside and pillowy insides” told me that it would work just as good with some garlic prawns.

Potato 1

The recipe is a test of patience but it is well worth the wait.  You’ll have to make the “potato ferment” five days before using it and then you proceed as if you were making a sourdough recipe (so, yes, you will also need a sourdough starter).

Potato 3

Ester’s Potato Bread

    • 250 g Dutch Cream Potatoes
    • 375 g water, heated to 27c
    • 100 g levain (sourdough starter near it’s peak)
    • 450 g white baker’s flour
    • 50 g wholemeal baker’s flour
    • 13g salt, plus extra for the potatoes
  1. Boil the potatoes until full cooked, then strain and pass through a ricer or mouli to form a smooth puree.  Add 2% salt based on the weight of the potatoes.  For example, 100 grams potatoes is 2 grams salt.  Then place in a vacuum-seal bag and remove all the air.  Leave this at room temperature for 5 days.  Sometimes the bag will puff up (mine didn’t).  Refrigerate the mix until needed.
  2. To make the bread, mix the water, 100 g fermented potato, and levain in a bowl of a stand mixer.  Add in the two flours and salt.  Using the dough hook attachment, mix on medium speed for 8 minutes.
  3. Allow the dough to bulk ferment for around 4 to 5 hours (depending on the weather, the colder it is, the longer you will need).  Stretch and fold every 30 minutes for the first 2 hours (four folds in total).  At this stage you can put it in the fridge or use it straight away.
  4. To use, pre-heat the oven with a pizza stone to as high as you can get it (at least 250c).  Form the dough in to bread rolls (around 130g each) and allow to rest until the oven is ready.
  5. When ready to bake, slide the rolls on top of the pizza stone and throw in a few ice cubes in the oven to create some steam.
  6. Bake for 13 minutes.  Remove then brush with olive oil and top with salt flakes.


This is a great sauce that you can put on pretty much anything and a condiment I suggest you keep handy in the fridge at all times.  It is fantastic over noodles, prawns, fish and for meat lovers out there, it would be great with chicken and rice reminiscent of  a Hainanese Chicken dish.

IMG_5366

Ginger Scallion Sauce

    • 2 tablespoons grated ginger
    • 2 cloves crushed garlic
    • 1 finely diced shallot
    • 4 to 5 spring onions, thinly sliced
    • 3 to 4 teaspoons salt
    • 1/2 cup neutral oil like grapeseed or canola
  1. Place all the ingredients except the oil in a bowl.
  2. Heat the oil until almost smoking and shiny.
  3. Carefully pour the oil over the aromatics.
  4. When the oil is at room temperature store in a jar and keep refrigerated.

IMG_5938
It’s starting to feel like winter in Sydney and I was inspired to make something hearty using polenta. I don’t know why I haven’t used polenta before, I’ve had it twice this week.  Once with a calamari ragu and tonight it was particularly with this seafood sauce and prawns.
IMG_5849

Prawns on Polenta

Serves One

    • 50 grams polenta
    • 120 ml cream
    • 1/2 onion and carrot, finely diced
    • 1 tomato, finely chopped
    • 2 tablespoons olive oil plus 2 tablespoons olive oil for the prawns
    • 1 tablespoon flour
    • 250 ml fish or prawn stock
    • pinch of sugar
    • 10 prawns, peeled and deveined
  1. Place the polenta in a pot with around 250 ml of water and bring to a boil then lower to a simmer.  Add a generous pinch of salt.  Stir the polenta every few minutes and cook until the grains have fully opened, around 40 minutes.  If you  feel the polenta is too thick, add some more water while cooking.  The idea is to get it to a texture you like.  At the end of the cooking add 60 ml of the cream.
  2. In the meanwhile, heat the olive oil in a pan and sauté the onions and carrots until soft, around 5 minutes.  Add the chopped tomatoes and a pinch of sugar and cook out for 10 minutes.
  3. To make a roux, add the flour to the onion and carrot mixture and cook out for a minute.  Next add the fish/prawn stock and continue to simmer until the sauce thickens, around 10 minutes.
  4. Heat a large pan with the remaining 2 tablespoons of olive oil and sauté the prawns until golden brown.
  5. To plate, spread the polenta on a plate, followed by the bisque and finally the prawns.

SP Squid
This recipe is roughly inspired by the Salt and Pepper squid bun from Lotus Restaurant in Sydney believe me, a keeper! My husband once went to the restaurant three times in one week for this.  Lucky, you can now make it at home.   You can also watch Dan Hong make squid recipe here.

SP Squid 3

Salt and Pepper Squid and Sliders

Serves Six

    • 500 grams squid, cleaned, scored then cut in to strips
    • 1 egg white, lightly beaten
    • Potato starch for coating the squid
    • Oil for deep frying

Spice Mix

    • 1 teaspoon each of salt, white pepper, five spice and chicken powder
    • 1/2 teaspoon sugar
  1. To make the calamari, dip the strips of squid in the egg white then coat in the potato starch.
  2. Deep fry the squid for around two minutes until pale and crisp.  Drain on paper towels.
  3. Grind all the spice mix ingredients in a mortar and pestle and sprinkle generously over the squid while warm.
  4. For the sliders, mix some siracha and mayonnaise on both sides of a milk bun, lay some fried squid and top with spring onions and coriander.

SP Squid2

JPEG image-88086A6F6FFF-1

For 14 years Baci was a source of joy, companionship and comfort to me and my husband. We had always grown up with dogs in our family but as loved as they were, Baci was the first dog that I invested so much love and time with.

When we first went to the breeder to choose a puppy from the litter I knew immediately she was the one. She was exactly what I wanted in a Labrador. Light yellow, almost to the point of being white, a large face and stock body. I insisted that the breeder paint her toes pink so when we picked her up two weeks later we could easily identify her.

Baci and I went through a lot together. I remember the first night she came home. We let her sleep in the laundry room and did not hear a peep from her the whole night. I thought I was so lucky to have such a brave puppy to sleep through the night without any barking or crying!

I remember the hours spent toilet training where I would take her out to the garden and we would have a stare off that lasted what felt like hours until she did her business and she could come back in.

I remember the first time she got sick and we had to take her to the emergency vet hospital. The doctor has said something along the line of “Well, we don’t know what is wrong with her and we will have to do some checks. The X-ray will cost $200 and the ultrasound will set you back $500 and she will have to stay here overnight so that’s another $250”. My husband said “Okay if that’s the case, can we just stay with her in the room?” The doctor said that there wasn’t a room, and that Baci would stay in a cage that night. Imagine $250 to sleep in a cage?! We learned our lesson and got pet insurance after that.

I remember training her all sorts of tricks – not only did she learn how to shake hands or play dead, she learned how to “bow”, how to raise both her paws in the air (her cue was say “amen”), how to dance and my personal favourite, how to press the button for the stop light.

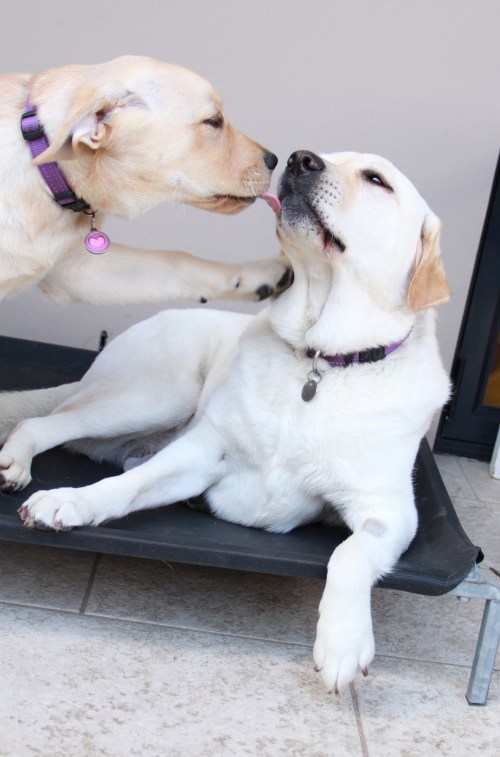
I remember when we got Bizou our second Labrador and how they used to play by chasing each other around the lounge room. I remember when we got our other Labrador, Pash – how irritated Baci used to get with her but then eventually accepted her as a younger sister to mentor.

I remember when my husband and I used to argue who she loved more. We played this game where we made Baci stand in the middle of us and we would stand on opposite sides and call out to her at the same time. It was always a source of bragging rights when she went to either one of us.

I remember all the long walks we had, how we taught her how to swim, how she used to jump on the bed and how she would follow me around the house waiting for me to give her a pat or a quick hug

A few weeks ago Baci started losing her appetite. It happened very gradually but it was noticeable given she was a Labrador. At first we thought it was because of her old age she was bored with eating the kibbles we gave her. So we started feeding her chicken and vegetables. When she refused that we moved on to other things – from canned fish, raw meat, premium dog food etc. She’d try to make an effort to eat but had become really picky with her food. About two weeks ago she pretty much refused to eat anything. So we had a blood test done. Turns out that Baci had severe kidney failure which was causing her to lose her appetite. The doctor told me that it was likely she had only a couple of days, weeks at most. “Try to get her to eat anything, whatever she wants to eat, even ice cream”, I was advised. Sometimes she’d eat a bite or two of liver treats and occasionally some sliced cheese but for the most part she just drank water. It was heart breaking to see her eat so little. But Baci was a trouper. She was still alert and loved to go on her daily walks.

I asked her doctor how would I know when it was time for Baci to go. She said “well, you need to speak to her and tell her that she doesn’t need to hang on and if she is ready to go to give you a sign”. I admit I thought that was weird and there was no way I was going to start talking to my dog like that.

On the 31st of January we decided to get Baci on a drip to hopefully clear out the toxins in her body and make her feel better. When we got home I tried to get her to eat more liver treats but even those she refused to eat. In desperation I reached for some of the Sourdough Ice Cream I had made a few days before. At last, she started eating! I was so happy to see her finally eating something/anything (!) after four days.

At the back of my mind I knew that sooner or later I would have to make a decision about when to put her down. Making a decision that is literally about life and death is traumatic and never easy. I knew I didn’t want Baci to suffer and as long as she was walking, alert and wagging her tail, I wanted to spend as much time as I could with her.

Unfortunately, that night things took a turn for the worst. Baci started shivering and started to lose control of her legs. We had to carry her up to the room and you could tell she had a hard time breathing. That night she left our room to drink some water in the courtyard then threw up and could not get up to go back to the room. I cleaned her up and sat down beside her. I whispered to her “Baci, if you are ready to go, don’t worry about us. Thank you for the 14 years of joy and love”.

That morning I called the vet.

My husband and I were with her as she peacefully went.

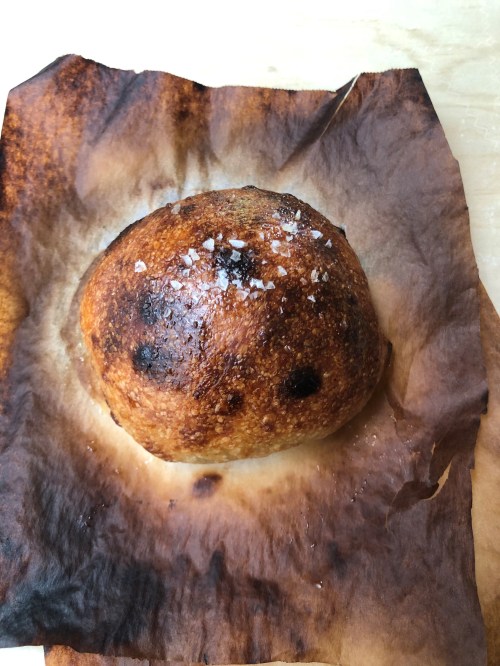
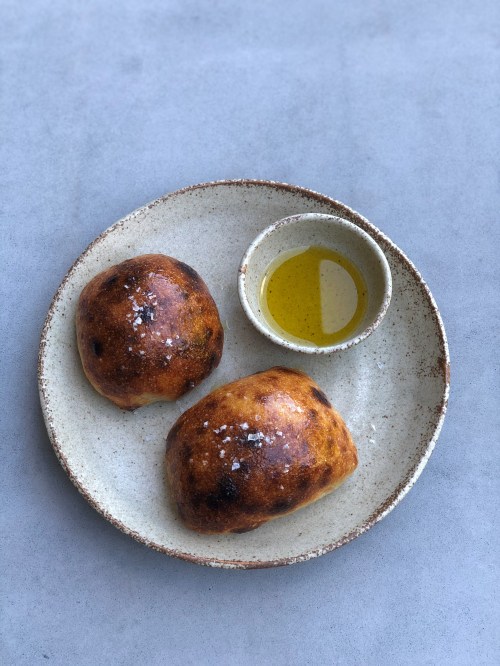
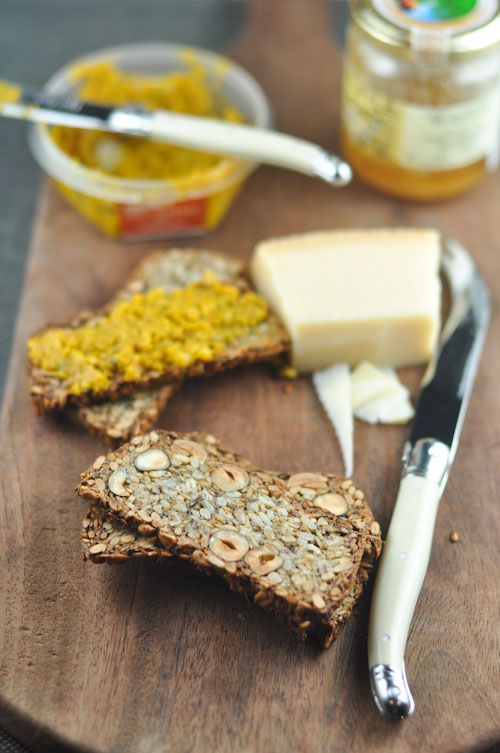
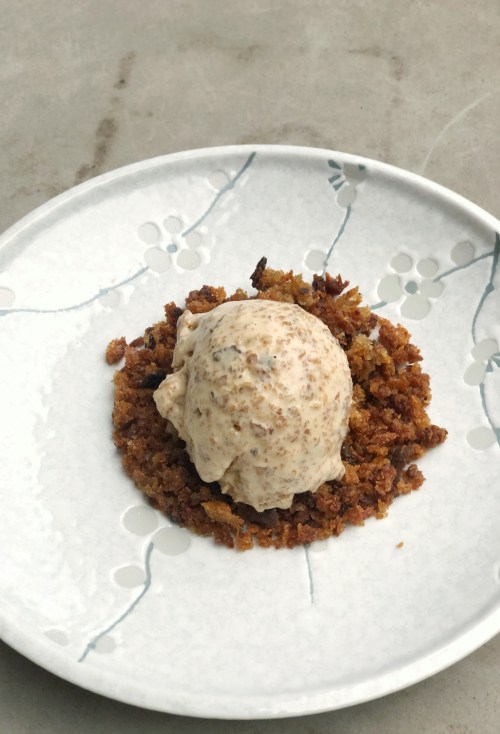
When I think of all the effort involved in taking care of a dog, it’s a little bit like making sourdough ice cream. It is truly a labour of love. My journey in making this started with me learning how to make a sourdough starter, then how to make sourdough bread culminating in my learning to make my own ice cream. It was an evolution that went over two years but very much worth the effort. I’m not a big ice cream eater but this is addictive – how could it not be when it’s got bits of caramelised sourdough enveloped by a creamy vanilla ice cream base. You can even save some sourdough crumbs and serve it on the side for extra crunch.

Having said that, to make life easier you can easily buy your own load of sourdough and just proceed with the ice cream recipe as written here.

When I look back on my life with Baci, I can honestly say I have no regrets. I want to tell everyone of all the wonderful times we had together but 14 years is a long time and while I can’t remember everything, I feel fortunate to say that there is no doubt in my mind that I could not have cared for her any more than I did, that we have a great life together and that she was loved so much until the very end.

IMG_7327

Sourdough Ice Cream

Serves 8

    • 150 grams Sourdough Crumbs
    • 300 ml cream
    • 170 ml milk
    • 60 grams sugar
    • 3 egg yolks
    • 1 teaspoon vanilla paste (best quality you can find)
    • 1/4 teaspoon maldon salt flakes
    1. Heat the milk and cream in a sauce pan until the sides start to come to a boil. At the same time whisk the egg yolks and sugar until thick and pale.
    2. Pour a third of the cream/milk into the egg yolks then give it a good stir. Pour the egg/cream/milk mixture back in to the sauce pan and heat until the mixture reaches 76c. Immediately strain in to a container and add the sourdough crumbs. Place this over another container filled with ice water to cool down quickly. When cool, transfer the custard to the refrigerator and allow to rest at least four hours or until you are ready to make the ice cream.
    3. Churn the ice cream following the manufacturers instructions (I churned mine for around 35 minutes) and immediately place in the freezer until ready to serve.
    4. Serve with the extra Sourdough crumbs.

Sourdough Crumbs

Makes enough for two batches of ice cream – Recipe from David Lebovitz

    • 250 grams old Sourdough Bread
    • 45 grams butter
    • 100 grams sugar
    • 1/4 teaspoon Maldon salt flakes
    1. Pre heat the oven to 180c. Tear the Sourdough in to 2 cm pieces and place in a food processor and process until you get fine breadcrumbs.
    2. Melt the butter until and continue to cook until the butter is browned and smells nutty. Take care not to burn the butter. When the butter starts to foam, add the breadcrumbs, sugar and salt and immediately take it off the heat. Stir the mixture to combine.
    3. Please the crumbs in a baking tray lined with wax paper and bake for 25 to 30 minutes until dark brown. Stir often to keep from burning.
    4. When done, allow to cool and store in an airtight container.

b2bd0c0b-6736-4d12-9712-c8625cefb48e

4f8f9728-3bc6-4208-963a-4e1b3c9ae105

IMG_5648.JPG

Hi!  I know it’s been ages.  You’re probably wondering if I’m here to make an appearance and then disappear after one or two posts… maybe… I don’t know.  But this recipe was too good to pass-up and not share with you.  I know I’ve jumped on the poke bandwagon a little bit late but – this is a revelation.  I have always wanted to have poke bowls for lunch but buying fresh fish and taking it to work has never been an option and the prices for sashimi in the food court at work is ridiculously expensive. So why not buy salmon and cook it sous vide and use that for poke.  The texture is pretty close to sashimi (maybe a little bit on the firmer side) and you can store it for a few days in the fridge if you’re not ready to use it.  Yes, this is super easy to put together and if you aren’t inclined to sous vide your fish – maybe use tofu or prawns instead – even chicken… I don’t know… I don’t even know if this is even a poke bowl anymore… maybe it’s just a soba salad that is disguised as a poke bowl?!?  I’ve brought it to work a couple of times already and it tastes awesome – so yes, you’re welcome.  Haha!

In case, you ARE wondering what happened to me since the last time I posted – well, YOGA took over my life…. and Pilates as well.  In the last year I took a teacher training course in Pilates (two actually but I kinda failed the first one!) and then I decided to take a Yoga 300 hour Teacher Training in Thailand… and now doing another  200 hour training.  I am hoping one day to find a way to blend my passion for food and “movement” (mostly Yoga).  If and only if you ARE interested (and why wouldn’t you be?!) go check out Trissalicious on Instagram. Follow me there – you’ll probably get to see a little bit more of me there.

Salmon Poke with Soba Noodles

Serves Two

    • 2 salmon fillets, sous vide 100 grams each
    • 1 tsp black sesame seeds
    • 2 tsps finely chopped green onions
    • Shredded Carrots
    • Shredded Red Cabbage
    • Edamame
    • Japanese Seaweed
    • Soba Noodles
    • Pickled Cucumber
    • Roasted Sesame Sauce (I used Kewpie)
    1. First Make the Sous Vide Salmon.  I suggest using the recipe here.
    2. Once you are ready to use the salmon, mix around 2 tbsp of roasted sesame sauce and top with black sesame seeds and finely chopped green onions.
    3. Top with the carrots, cabbage, edamame, seaweed, cucumber and whatever else you’d like to add.

Life Changing Cracker

A few days ago I stumbled across a recipe for “Life Changing Bread”. Again, normally I would be skeptical about such a bold statement but given that I had recently made a bold statement of my own, I gave this recipe the benefit of the doubt. So off I went to the health food store to buy ingredients I had never ever heard of (psyllium, flax seed, chia) and $15 later (this was going to be one expensive loaf of bread!) I was ready to bake.

Essentially you mix all the dry ingredients together and bind it with a combination of water, maple syrup and coconut oil. Then you let the bread sit, and then bake for 20 minutes, turn the loaf over and bake for another 40 minutes, then let rest until cool. Was it good? Yes. Was it Life Changing? I’ll have to be honest and say not really. I found the texture to be a little bit… slimy.

Now I normally don’t like eating the edges in a loaf of bread, but I found the edges of this loaf to be particularly yummy – nutty and crispy. So why not slice the rest of the loaf and bake it again to get dry out the dough like a biscotti? So I sliced the rest of the loaf in to thin slices and baked at 175 c for 20 minutes.

Success! This time, the crackers were amazing, on it’s own, topped with pumpkin and cashew spread, topped with cheese and truffle honey etc. The crackers were delicious!
It was only after that I realized that blogger who posted this recipe also had a recipe for Life Changing Crackers on her blog. The technique is different though, it that she spreads the mixture in between two sheets of baking paper and rolls in to a thin sheet.

Whichever way you decide to make the crackers (baking it a third time like I did, or rolling it out in to thin sheets), this is a winner recipe… and dare I agree? Life Changing!

Life Changing Cracker topped with pumpkin and cashew dip

Life Changing Cracker topped with pumpkin and cashew dip

Superfood Salad

Superfood Salad

I am one of those people that are always skeptical of anything “healthy and delicious”. I used to think those two words could never co-exist in the same plate, like “airline food” or “diet ice cream”. I must admit though, in the last few months I’ve had to eat my words, so to speak. I now love to challenge myself to find tasty and healthy food and my salad is the poster child for this. The “fitspiration” comes from a little cafe near where I work called “The Nook”. Smoked Trout, Watercress, Quinoa, Edamame, Beetroot…How can you go wrong with an ingredient list that sounds like a superfood checklist?

I hope I can convince you to try it – I know it’s a bold claim – is this really the best ever Superfood Salad? You’ll have to try it and let me know!

No particular recipe here today – just a general guideline on how I put this together.

Chunks of Black Pepper covered Hot Smoked Trout (or Salmon)
Watercress
Edamame
Quinoa
Hardboiled Egg (or a poached egg would be great)
Roasted Beetroot (sliced beetroot drizzled with olive oil and seasoned, then roasted for 25 min at 200c)
Toasted Pine nuts
Caramelized Balsamic Vinegar and a squeeze of lime to dress the salad

Salmon Tarator

Salmon Tarator

At start of this year I signed up for a 10 day challenge on this site. The idea was each day I would get an email prompting me to take on a small risk, in order to do something that would take me outside my comfort zone. For example:
1. Take a new route to work
2. Try a new exercise
3. Go to an event where you don’t know anyone
4. Reach out to someone and tell them you admire them
5. Try a new food

I particularly liked Challenge 8 which was “try a new recipe”. So here it is. This recipe is from Greg Malouf and I’ve adapted slightly based on the ingredients I had on hand. Sometimes I tend to stick to what I know but I’m glad this challenge prompted me to learn a new way to cook salmon and try new flavours with the “Tarator” crust. To cook this Salmon, you will bake each fillet in a parcel for 12 minutes at 80c then turn the fish over and re-wrap and cook another 12 minutes – then allow the fish to rest. The result is a perfectly moist, cooked salmon. The Tarator crust is as delicious as it is pretty too.

I loved the 10 day challenge, it definitely took me out of my regular routine, I’m thinking that it’s worth doing the challenge once a quarter, just to keep things interesting!

Salmon Tarator

Serves Six

  • 6 pieces salmon filets, skin on (250 g each)
  • 80 ml extra virgin olive oil
  • Juice of 1/2 lemon
  • 2 tbsp sea salt flakes
  • Fragrant Salt

  • 1/2 tsp each cumin seeds, coriander seeds, cardamom seeds, fennel seeds and nigella seeds
  • 1/2 tsp sesame, toasted
  • Tarator Crust

  • 100 grams pine nuts
  • 2 small red onions, finely diced
  • 1 cup coriander, finely shredded
  • 1/2 cup mint leaves, finely shredded
  • 3 tsp sumac (I substituted dukkah)
  • Tahini Sauce

  • 100 grams greek yogurt (I substituted labneh)
  • 30 ml hulled tahini
  • Juice of 1/2 lemon
  • 1 small garlic clove, diced, mixed with 1 tsp salt
  1. Make the fragrant salt by dry roasting the cumin, coriander, cardamom, fennel and nigella seeds in a frying pan for 1 to 2 minutes. Cool. Place the salmon in a tray and spread the salt all over the filets. Cover with plastic and place in the refrigerator for 1 hour.
  2. For the Tarator, toast the pine nuts in the oven at 160 c for 10 minutes or until golden. Once cool, finely chop the pine nuts and mix with the red onion, shredded coriander, mint and sumac (or dukkah). Place in refrigerator until ready to use.
  3. Prepare the Tahini sauce by mixing all ingredients together.
  4. To cook the fish, pre-heat the oven to 100 c and place each fillet (skin side down)along with 20 ml of olive oil in a sheet of baking paper and wrap in to a parcel. Cook the salmon for 12 minutes then remove from the oven and turn the fish over and wrap again. Cook for another 12 minutes. Once the fish is done, allow to rest for another 10 minutes.
  5. To serve, place the fillets on a serving tray, top with the tahini sauce and press the tarator crust in to each of the fillets, on top of the tahini sauce. Mix the 80 ml of olive oil and the other half of the lemon and drizzle over the fillets.
Salmon Tarator

Salmon Tarator

Pam's Fresh Lumpia

Pam’s Fresh Lumpia

I met Pam over a year ago when I held a macaron class to raise money for the victims of Typhoon Haiyan. She signed up for the class and we got along straight away (it helped when I found out she worked in the food industry!). When the class ended, everyone left, but Pam and Kath stayed for lunch and that was the start of our friendship. Today, Pam is not only a great friend to me, but she is equally close to my siblings. She has an open invitation to all our family gatherings.

I learned this recipe from Pam. It comes from her Ama (grandmother). If I remember correctly, her Ama used to make this and another dish, Misua noodles, whenever it was someone’s birthday in their family. Then her Ama would personally deliver the food to each family. What a lovely tradition! One night Pam made this and the Misua for our family. It wasn’t anyone’s birthday but the amount of work she put in to the two dishes made all of us feel like it was!

I could eat this every day. Actually, that is a fact. There was a period where I must have eaten this for dinner two straight weeks – sometimes lunch and dinner. This is one of those dishes that tastes so good and is so filling that you don’t miss the fact that there is no meat! Two things I’ve changed – I’ve omitted the fresh lumpia/spring roll wrappers but you could easily purchase this from the frozen section of your grocery. I also omitted the sweet garlic sauce that you pour over the spring rolls. This recipe makes a lot – enough for at least 6 people. It also keeps well so great to make ahead.

Ama’s Lumpia

  • 50 ml vegetable oil
  • 2 onions, sliced
  • 3 garlic cloves
  • 2 tablespoons chicken powder
  • 4 large carrots, peeled and grated
  • 1/2 head of cabbage, sliced
  • 300 grams green beans, diced into 1 cm pieces
  • 500 grams firm tofu, drained and diced into 1 to 2 cm pieces
  • 200 grams crushed peanuts
  • 2 teaspoons sugar
  • 1 teaspoon salt
  • Coriander leaves for garnish
  • Optional: Cut nori sheets for garnish
  • Fresh lettuce leaves to serve
  1. In a large pot, heat the oil and add the onion, saute until translucent. Add the garlic and chicken powder (for seasoning)and cook for two to three minutes.
  2. Add the grated carrots and cook until wilted, around 5 to 7 minutes on medium heat. Add the cabbage and continue to cook until the cabbage is slightly wilted, around 10 minutes. At this stage, you will notice a lot of liquid seeping out of the vegetables. Add the green beans continue to cook around 5 more minutes. You are looking for the beans to soften but retain some bite.
  3. Finally, add the tofu and mix into the vegetables and cook for another two to three minutes. (Optional step:Pam drained the vegetable/tofu filling before assembly.)
  4. Make the crushed peanut mixture by processing the peanuts, sugar and salt in a food processor for a few seconds
  5. To serve, place a heaping spoon on to the lettuce leaves, add the crushed peanut mixture, top with coriander and nori.